So. You’ve upgraded your Mac and you’ve decided to sell your old Mac. Just how do you go about removing all your personal data?
Erase Everything! (The Nuclear Option)
If you’re not worried about leaving Apps on for the lucky purchaser or free beneficiary of your new Mac then the best method is the Nuclear option:
1. Boot from the Recovery Disks
2. Open up Disk Utility and select your Hard Drive
3. Pick Erase from the options and then click on “Security Options”
4. You should be fine with selecting the First Option and then hitting Erase
5. But if you want to be MORE secure then options get safer down the list, but…
6. Just remember the more Secure the erase the longer it’ll take, especially for large disks!
A More “select” Erase (The Precision Bombing Option)
If you’re running a newer version of Mac OS than came with your Mac and/or you don’t want the hassle of erasing the disk and then reinstalling the software then this might be the
How To Securely Empty the Trash
First we’ll want to make sure that when we delete stuff Finder is not just removing it’s file location (which makes files easily recoverable for those in the know) but that it’s securely deleting the files by writing over them with gobbledygook.
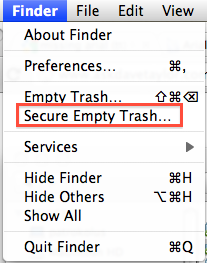
To do this once all you need to do is add the files to the trash and then go to the Finder Menu and select “Secure Empty Trash…”:
But as we’re probably going to be doing a lot of deleting it’s probably best to go to Finder and set this as the default preference. So if you click on “Preferences” instead of  “Secure Empty Trash…” it’ll bring up this window:
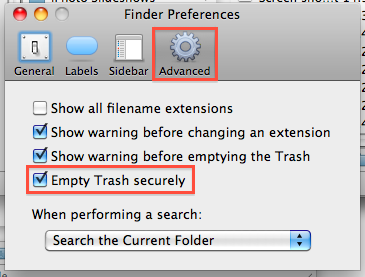
Where you should make sure that the box labelled “Empty Trash Securely” is ticked and now each time we empty the trash as normal it’ll be deleted securely.
Deleting Apps
Most people who sell or gift their Mac leave some if not all of the applications installed, but if you’re deleting any of the apps then you’ll want to make sure that you do it properly, and there is just the app for that, they’ve even been so bold as to tag it “the Uninstaller Apple Forgot”.
AppZapper makes sure that all the little hidden files that an App installs are also deleted. This is especially helpful if you’re uninstalling programs that are available to all users, as these will create preference files, etc, in the root library rather than your user account library. It’s well worth the $12.95 purchase price, and I’m pretty sure that there is a free trial.
I use a version integrated with Hazel that I bought years ago so I haven’t checked).
Don’t Forget System Preferences
If you’ve installed any custom system preferences then to remove them simply launch System Preferences and right-click on the appropriate custom system preference and select “remove preference pane”.
User Files
So you’ve copied all of your user files from the Mac onto a spare hard drive, usb stick or (my personal favourite) your dropbox account and you now want to delete your user data, the best way to do this is to go to Users in System Preferences:
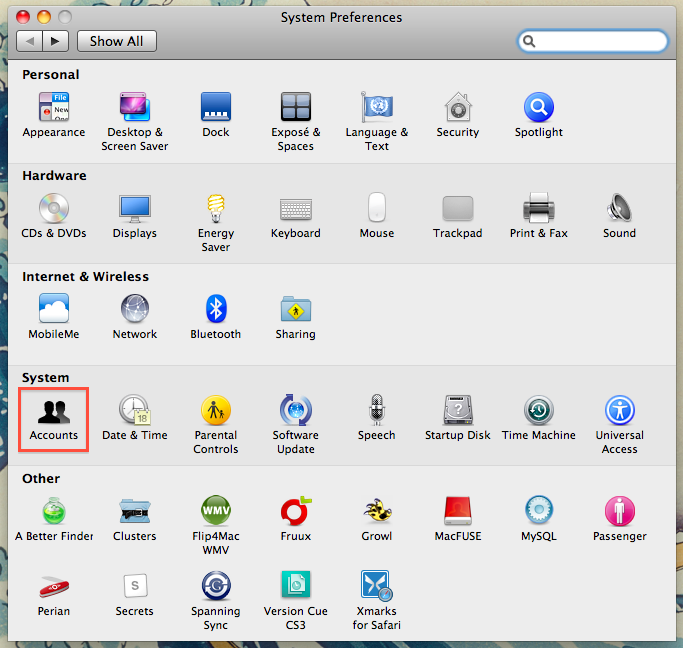
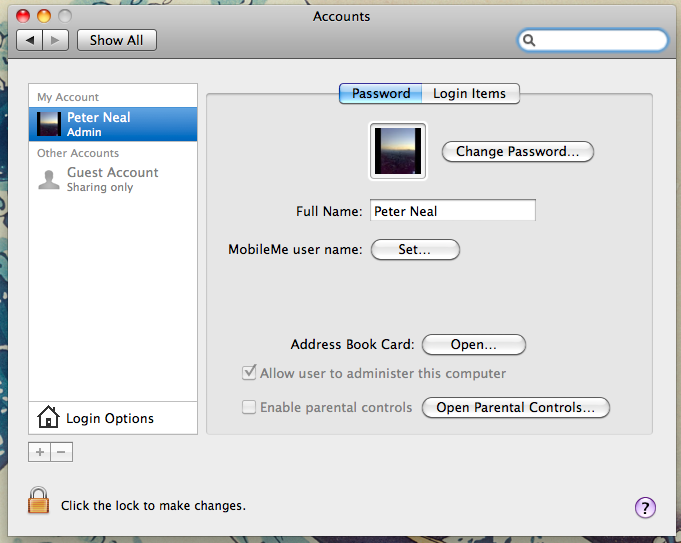
and select accounts. Then if it’s locked as in the above picture you’ll have to unlock it before you proceed so click and enter the password. Then you can select the little + button at the bottom of the User Name list to add a new user, which takes you to this window:
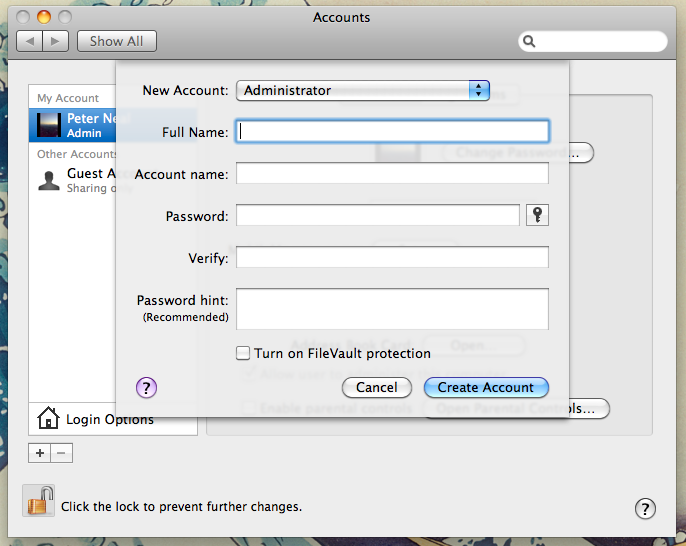
Make sure you select a new Administrator account (no it’s not the default) so you’ll have to click on the list and select Administrator like below:
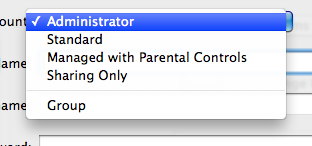
Then create a new account administrator account, name it as you like and give it an easy to remember password, say “password’, the new owner can always change it to something better.
Once you’ve created your new account, you can safely log out of your current account and into the new account and once in you go straight back to the Accounts section of the System Preferences. And instead of adding a new account, select your old administrator account and click the – instead of the – and delete your old user account.
Oh and make sure you tell it to delete the user home folder. And that you empty the trash securely.
And you’re done. One “pretty clean” Mac.
Notes for the Security Conscious
PS If you want to be extra cautious once you’ve done this you can use Disk Utility to erase the empty space on your Hard Drive, which will give it another good going over.
PPS This method is itself reasonably secure but the only truly secure way is to opt for the Nuclear Option or even better don’t sell your Mac with the Hard Drive.
I’m a small business consultant enabling small business owners to achieve sustainable growth, whilst working part-time at Tees Valley Arts. For more about me personally see peterneal.co.uk
